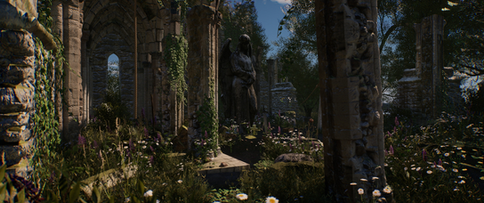
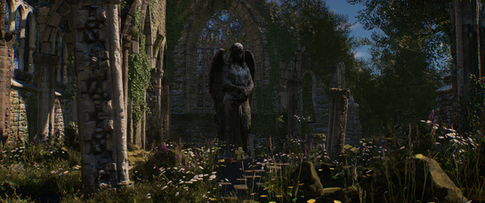
top of page
Sacred Light: Illuminate the Fallen
A detailed breakdown onto how my I created my Senior Capstone final project in Unreal Engine utilizing three different lighting passes.
Introduction
Hello, my name is Kayla Tran and I am a Senior at Texas A&M University under the Visualization program at the College of Performance, Visualization, and Fine Arts pursuing a B.S. in Visualization and a minor in Studio Art. I have always been intriguied by the nature of how moods and tones are set within a rendered environment, and what roles certain aspects make to create the overall composition. I've realized throughout my college career that I have a large passion for lighting in a 3D environment and thus, wanted to create my Senior Capstone utilizing these interests. It took me awhile to come up with a name for this project, as I've always just called it dynamic lighting in an environment, but landed on "Sacred Light: Illuminate the Fallen". I've learned a lot through this project, and hope that I am able to learn a lot more in the future through my goals of wanting to become a visual development artist.
Inspiration, Research, and Compositional Analysis
From taking a pre-capstone research course, it took me awhile to understand what exactly I wanted to do and how I wanted to execute it. I saw a few articles/projects where others have either recreated lighting from a film, or created lighting three different ways under one environment. That then brought me to my research study of how lighting may psychologically affect an observer whilst in the same environment.
I knew that I wanted at least one main subject and focal point. Stemming from my interests for stone statues since high school, I wanted to have my subject be a stone statue. Thus, I started researching statues that would fit my scene the best. I was heavily inspired by the Weeping Angels from Doctor Who, as well as female angel statues in general. I ended up finding the perfect statue from FAB on the Unreal Marketplace and used it ever since. I also grabbed my environment from the marketplace, though I spent many days deciding which environment I wanted to use. I dawdled between an interior or exterior environment, but found that an exterior environment would give me more control to have a more dynamic environment as opposed to an interior environment. I had over 20 different environments that I found, and was close in choosing between the environment I ended up choosing (Abbey Environment), a forest, or an abandoned train in the forest. I decided on the environment that I chose due to the large stained glass window that was included with the assets due to my love for stained glass windows.
As for the three lighting passes, I decided on these three:
1) Stylized, bright early morning (content and determination)
2) Foggy, muted day (eerie, unwilling, uncomfortable)
3) Heavily green, dreamlike qualities (uncertainty, disorientation, distortion of reality)
For these three passes, I did a lot of research in films and mostly open-world games. For the first pass, I looked into movies like Sunny Days, Lord of the Rings, Twin Peaks, Amelie, How To Train Your Dragon 3, Barbie, Red Dead Redemption 2, and What Remains of Edith Finch. For the second pass, I also looked into What Remains of Edith Finch alongside my main inspirations being Final Fantasy VII Advent Children and Silent Hill. I had more inspirations such as Sleepy Hollow, Donnie Darko, Alan Wake, Under the Skin, and Lord of the Rings. For the final pass, I was heavily inspired by Fallen Angels, The Matrix, Supernatural, Harry Potter and the Chamber of Secrets, and Everything, Everywhere All At Once.
Background and Softwares
Originally, I wanted to display lighting in three different contexts, although I did not know how I was going to achieve that. My motivations were to have an in-depth analysis of how lighting can affect an environment and how it may psychologically impact a viewer’s thoughts in decision-making. Historically, lighting has impacted animation through the introduction of three-dimensional animation by allowing viewers to perceive depth through shadows and values. Here, lighting evokes various values and displays how a scene is set to determine mood, time of day, and art direction. Furthermore, the relevancy of compositing through colors can be very effective in altering the impression of a film. Then, this implementation results in an audience’s transformed perception of the appearance of lighting to convey emotion and its linkage in color theory. Within the research, one may come to find how utilizing various components to create certain atmospheres can change an environment completely. For example, a cold and blank environment can symbolize emptiness, while a warm and encouraging environment can evoke a sense of livelihood. Ultimately, lighting is key to creating a scene through its purpose of visually communication vital information for a story. A difference in lighting utilizing dynamic effects influences one’s mood and how textures, colors, and objects are perceived relative to their environment. Dynamic light affects the observer psychologically through various implementations, highlighting varying elements to enhance a composition, as well as modifying how an environment is perceived. Through these notions, I wanted to implement my findings and prove through my project on how effective lighting is to a single virtual space.
For this project, I used Unreal Engine 5.5, Adobe Photoshop, Adobe After Effects 2023, Adobe Lightroom 2025, and Clip Studio Paint interchangably. I rendered everything in UE5.
Layout, Environment, and Set Dressing
After I found my environment, I started off my selecting anything I didn't want in the final render and removed them. I took out the main assets of the scene, but kept the overall infrastructure. I also moved some things around, such as the columns to help with compositional framing. I found a great asset of an angel statue from the FAB Marketplace and added it to the scene. Here, I deleted most of the foliage and started my own foliage painting to help with framing and storytelling. I centered it mostly around my statue as its surrounding area, with the highest parts being on the corners of my scene. I did some slight set dressing with clay pots and chests, but those are not seen within the scene. I also decided on a cross and sword, inspired by Cloud Strife's buster sword and Final Fantasy VII: Advent Children.
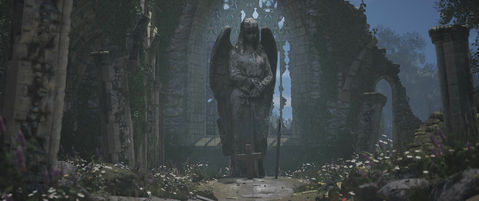
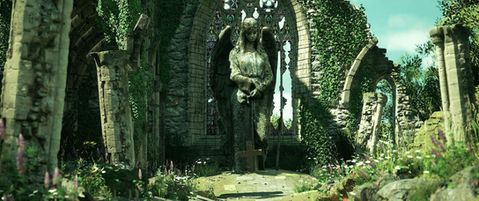
I made around five iterations, with my favorite ones being my shot_2 and shot_3. I had gotten some drawovers from my mentors, Richard Turner and Val Perez from Sony Pictures Entertainment and ILM Studio respectively, to fix any layout issues. It definitely took me a few weeks to get layout out and finished, but it was rewarding to have a final scene to begin my lighting in. Like how my painting professor once told me, sketching finishes at least 10% of the painting, with the last 10% being the actual painting part. I dawdled between shot_2 and shot_3, but with careful discussion with my peers in my capstone studio, we all decided that shot_3 would be the most visually appealing. Thus, I stuck with shot_3 from here onwards (around week 6?).
I had all of these iterations out on a 22-28mm focal length so that I could get most of the environment in scene, but later realized that it would be too busy and more like an establishing shot than a normal, rendered still. I also wanted the window to feel more grand, so in the later weeks, I changed the focal length to around 66mm and zoomed out to account for how close I was to the statue. This definitely helped make the window a lot bigger, while still keeping the overall environment intact.
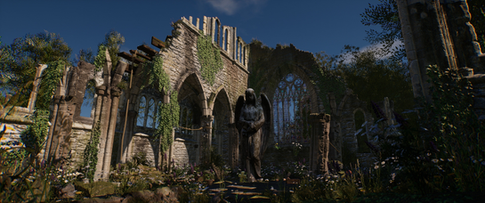
After tweaking my scene a bit, I landed on this layout to which I continue to tweak over the next week or so. Near the end of my project, my file got slightly corrupted and thus I had to restart my foliage. The final layout was not entirely finished until maybe around week 10 as I made slight modifications to the mound and any tangents I had with the secondary assets against the statue.

Lighting
My first iterations from Milestone 1 were rough. I had the basic language down, but needed heavy revisions in order to really set the tone of each scene. I would say that my second lighting worked pretty well, as well as my first pass. The third lighting pass was very out of place that I needed to continue researching scenes to understand light placements and values.
Lighting 1:
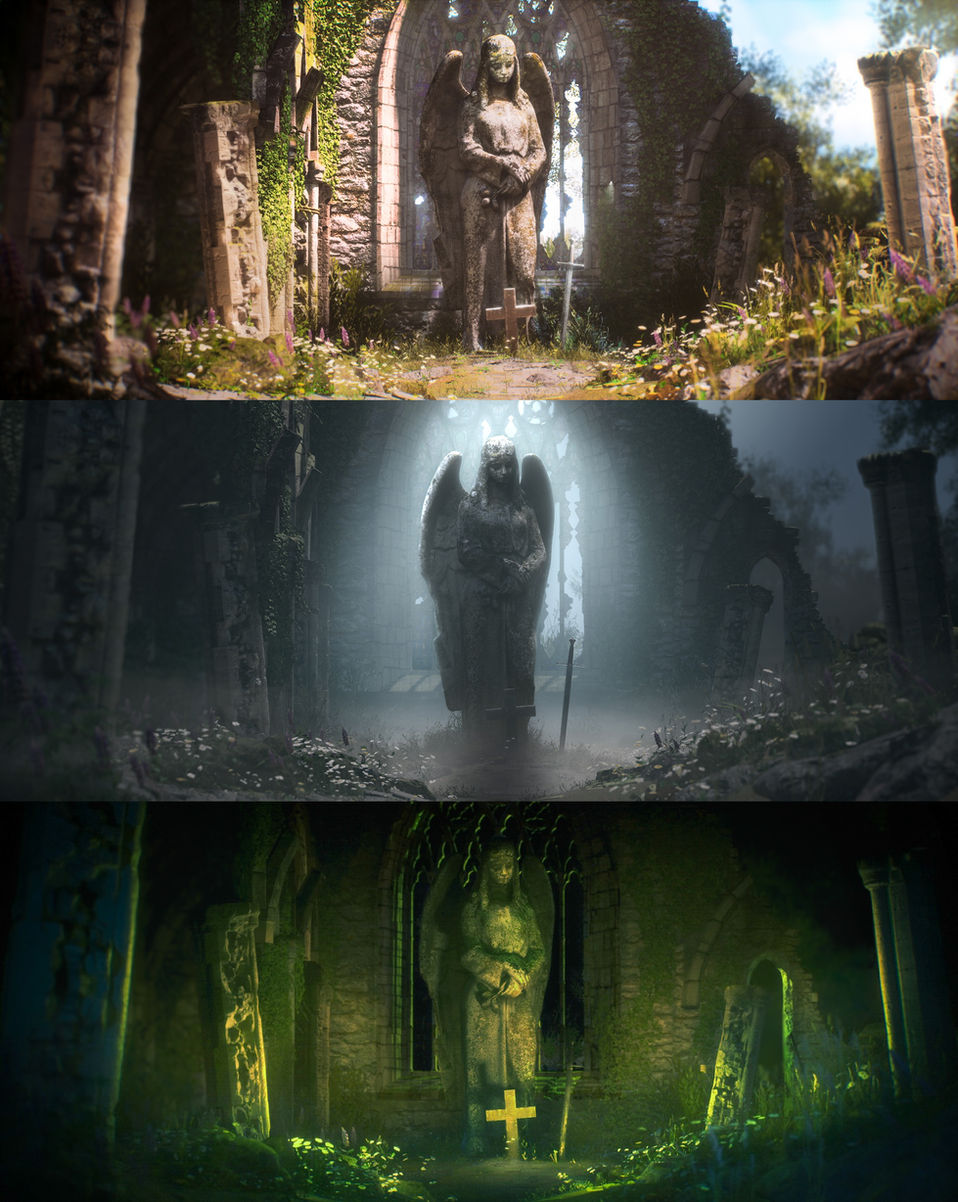
For this iteration, I really wanted to implement the ideas of determination, happiness, and a fulfilling day. I knew that I wanted this scene to be more saturated and stylized, but knowing how to implement it was challenging. I originally wanted god rays in my scene, but was unable to utilize the directional light in Unreal Engine 5.5 to create this setup. In my first few passes, I had too much contrast and no overall sense of directional light. I realized that since I have some sky breakup on my right side of my composition, I could utilize this to my advantage and found a new direction for how my lighting could set up my scene. Here, I decided to have the lights hit my statue from the right side of the scene, highlighting the most important parts of her face and letting everything else fall slightly into shadow. To add more depth to my scene, I also darkened the left side of my composition, especially where the alley of the infrastructure lies. I slightly changed my lights to a warmer hue, and overexposed my sky to read the scene better. I originally loved the bloom in my weeks 9-11 renders, but was told that it left the statue more into haze than needed. Thus, I dialed it back and added more atmosphere behind her to highlight the statue further and let the window fall into background. This was from great advice given by my professor, who told me that she blended into the window too much. So, I increased my exponential height fog and added some intense bloom to where the sky penetrates the window to match the storytelling of the sky's light spilling into the infrastructure on the right side.
From week 11, you can see how the sword built a tangent with the lines of the window in the background. I split this up in week 12 and increased the rim light on the sword to read better. Unfortunately, I could not add any depth of field to my scene to read well enough, and had to do this in post production. I did most of the lighting set up in Unreal, and fixed the following in compositing:
- I rendered out cryptomattes and path tracer and mashed them together
- Increased bloom
- Overexpose sky
- Added vignette (except for top right side)
- Artificial depth of field
- Darkened left side
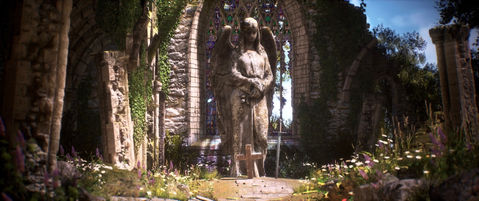
Lighting 2:
For this iteration, I really reeled in on the Final Fantasy VII/Silent Hill look. There wasn't a good enough way to implement fog and haze into the scene, so I purchased EasyFog by William Faucher in order to achieve the dense fog at the base of the statue. At the beginning of my lighting test, my scene was in the right space for creating a foggy day, but felt too flat and underexposed. I needed some way to highlight this scene, so I went with the backlit look. I knew I had to utilize my window in some type of way, and landed on having light shine through to highlight the statue with the sense of awe. It didn't feel as grand with all of the height fog I added, so most of my finalized lighting came from compositing. Through Adobe After Effects, I learned how to create a light wrap to engulf and bring her into scene better. I went a little overboard on this effect and dialed it back a bit, as well as add a shadow at the base to help sell the backlit look more.
Lighting 3:
This iteration was most definitely the hardest challenge I've had to face throughout this semester. I had no sense of direction or any sort of idea on how I wanted my final lighting to look. As you can see from the first iteration, it looks like my first iteration but with a green filter on it. Since my first two lighting passes are more set during the first half of the day, I decided to make my last iteration dark and lit solely by this mysterious light source. I decided to have her all underlit, but didn't exactly know where I wanted the light source to be. I originally had everything one color (green) but found that it looked boring and flat. A classmate of mine told me that an analogous color scheme would be good to push for more of a dynamic lighting scene. I used yellow, blue, and green hues for the hottest points, shadows, and fill ight respectively. I wanted to have gradient cards to have more of a fissure cut through at the bottom of the base, but I was unable to find a way to implement this and had to settle for compositing instead. I added more lights in the midground and added more lights on the back wall since I didn't really like how dark it was in week 11.
Materials
For the implementations, I created a material instance for a stained glass effect for my first lighting scene and added it to my scene. This part was really fun to make because I've never used blueprints before! I also downloaded EasyFog as stated previously, and added those cards to my second lighting scene for that foggy, Sleepy Hollow look.
Challenges and Solutions
I had so many challenges throughout this semester... From render crashes to corrupt files, I spent so long on this project that I ultimately prevailed! I didn't have path tracer for half of the semester, so a lot of my ambient occlusion didn't show up properly. Once I was able to get these render settings out, it took me almost an hour for each pass to render the path tracer. Also, the EasyFog disappeared when I rendered my second scene, so I had to fix this in compositing, adding to the time spent working on each scene. A lot of challenges I had was in Unreal itself, which I was able to fix in post production. For example, I was unable to add subsurface scattering in the material nodes and had to fake this through masking in compositing to add in that bounce light. Overall, I found that compositing was my best friend in this instance and helped me wrap anything up that I was unable to fully complete in UE5.
For a better workflow and streamlining my project, I was told about level streaming and how I can set up different levels for each lighting pass to easily render instead of having to unclick everything each time. At first, I set up my levels but my renders didn't render my scene out. I realized that this was because I parented the overall level incorrectly. I realized my mistake early on and fixed this, which optimized my render times greatly, as well as my overall organization.
Time Management
At the beginning, I wanted to complete my layout very quickly but was unable to do so in a quick manner. I thought that I could get over this quickly, but it took me around seven weeks to finalize my layout. I didn't think that it would take this long, but there were a lot of compositional errors that I created that did not help focus my subject well enough. So, I created some drawovers to see how I could lead the observer to the subject. Drawing these leading lines definitely helped me understand my composition a lot better.

Highlights
My favorite part of this entire semester was creating the stained glass material since I loved learning how to make blueprints, as well as the second lighting pass. Compositing in After Effects was super fun, especially when I learned how to render out cryptomattes to isolate certain objects and manipulate them better. I also loved learning how to create the light wrapping effect since it was a bit difficult having to isolate the statue and rendering it out as a png to then create the overall effect.
I think overall, I just enjoyed the post production side of the project rather than production as I really enjoyed getting my scene closer and closer to my overall vision.
Mentorship/Feedback
My two mentors that I chose for my project were Val Perez and Richard Turner. Val currently works at ILM, and Richard works at Sony Pictures Animation. Val helped me with my lighting set up, while Richard helped me focus on layout.
I met with Val over LinkedIn throughout the semester, and they’ve helped me so much throughout the entire process of my capstone. Since they have experience in lighting in an environment, they gave me a lot of great pointers that I did not previously know, as well as how to set up my composition well enough for the lighting to really enhance it. Everytime I contacted them, they were so kind and understanding with how they spoke to me. They were very patient and professional, as well as very communicative if I had any questions or ideas! We met once a week, and since they work a full-time job at ILM, it took maybe a few days for them to get back to me. However, everytime they responded to me, they gave me a very lengthy and detailed explanation to my questions. I definitely learned a lot from them, especially in setting up my lighting cues.
I knew Richard from the beginning of the semester, where I set up a meeting with him to discuss his career and how he got to where he is now. We built a connection from then on, and he tried to help me find a mentor for my capstone. Though, that fell through and he ended up being my mentor! Since he is the head of layout, he is definitely very experienced with how to set up the camera. Thus, he helped a lot with my layout and how I could maneuver my scene in a way that really captured a great composition. We spoke a few times over LinkedIn as well, though he is very busy and we did not meet as often as Val and I did. I learned a lot about layout from him and how I could really draw the focus into a subject.
Results
After spending a lot of time in post production, my final renders include that depth of field I was missing originally! My first lighting pass is highlighted from the right side with bright sentiments. The second lighting pass is backlit, but with a moodier, eerie tone and unwillingness. Lastly, the third lighting iteration is dark and underlit, with just the light coming from the light sources on the ground. I wanted to evoke the feeling of disorientation and dreamlike qualities.
Future Work/Goals
In the future, I would like to know more about render settings since I didn't have the time to fully learn about how I can render and optimize my scenes. I would also like to learn more about pathtracing, and how I can get my render without having to composite a quarter of my scene.
I would like to create a short video clip of integrating all three lighting scenes together, possibly through a push-in or transitions.
Outro
Looking back on this project, I'm definitely very happy with my thesis and choosing this topic to dive in on. Since I hope to continue pursuing lighting in the future, I was glad to learn alot about lighting and how much I can further improve on this area of interest. There are definitely better workflows I can improve on, but level streaming was one of my favorite things to learn (which I will be implementing more in my future works). With all of the hardships and time I poured into this project, I am really happy with my results!
bottom of page


